MacBook Air Repair

I was given a MacBook Air, that had an unfortunate encounter with a glass full of orange juice, and was asked if there was anything I could do to repair it. I said I would do what I could but offered no guarantees. What follows is the work to bring it back to life.
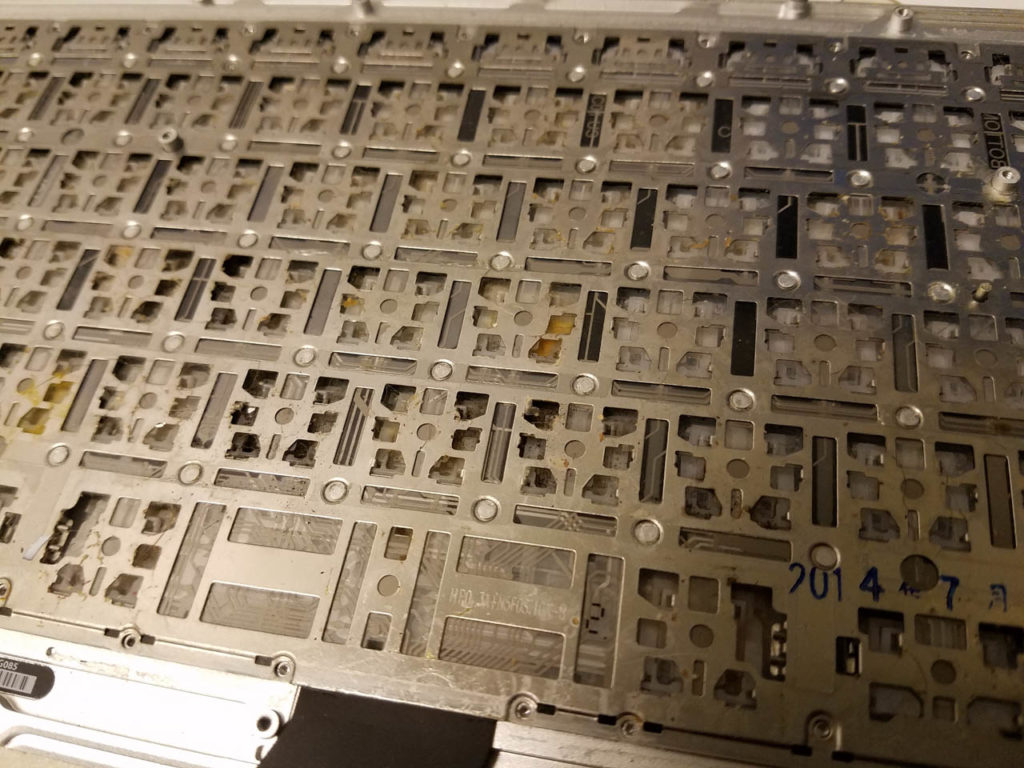
Keyboard: Alive, but not well
The underside of the keyboard, with backlighting removed. You can see that it soaked up quite a lot of the orange juice that was spilled, and mold is starting to grow in a few spots. I soaked it in alcohol for 10 minutes, and rinsed it with deionized water. After a second rinse with alcohol to displace the water it was left to dry in a heated locker for the rest of the day. After it was dry, some keys still stuck, or would not "bounce back" very well so it was scrapped.
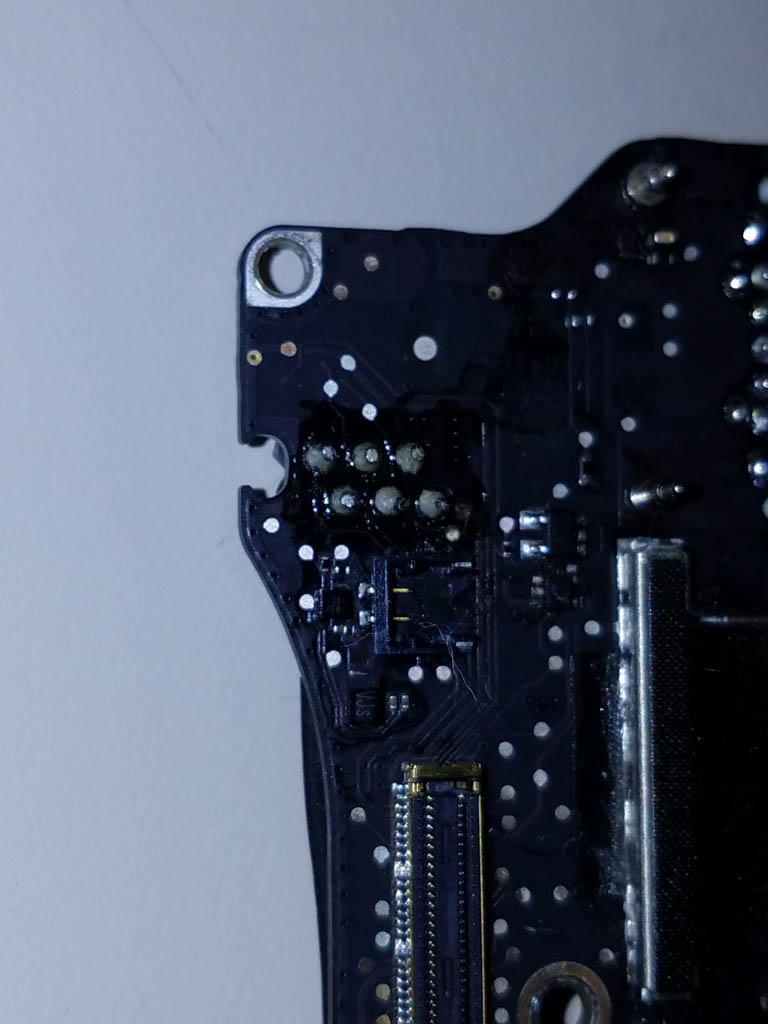
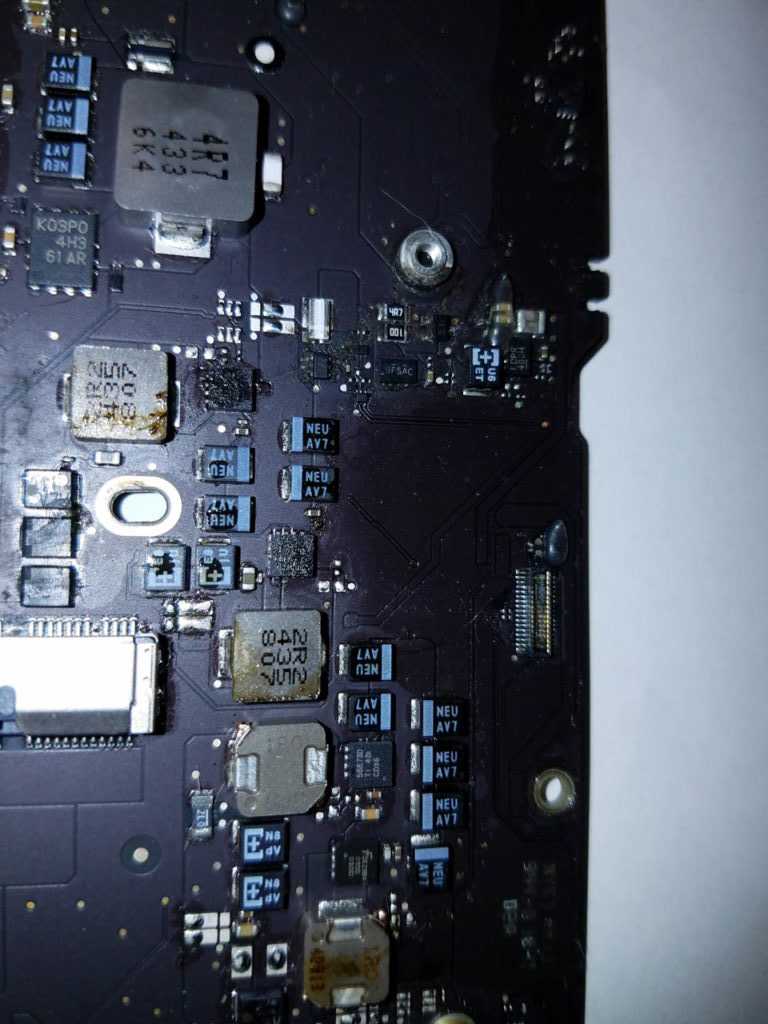
Logic board before cleaning #1
This, and next four images show the logic board as it was when I pulled it out of the computer. The orange juice had dripped out of the keyboard backlight and got on a few parts of the board.
Logic board before cleaning #2
It was pretty clear the the juice, owing to it acidity had corroded several parts of the board. At this point I was hoping fervently that it had not gotten under anything that was mounted in BGA or similar style (all the contact point are under the component, and I do not have access to tools to work on them.)
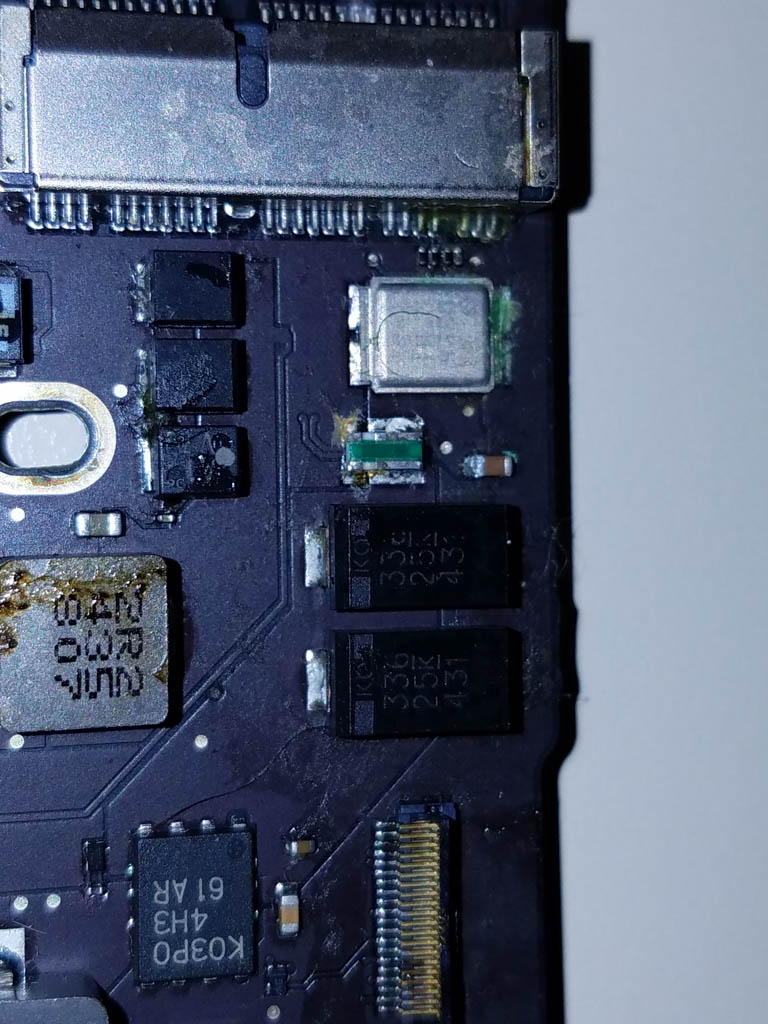
Logic board before cleaning #3
I got lucky here: these two parts have contacts under them, but after cleaning the surface corrosion, there was no evidence that there was any hidden damage.
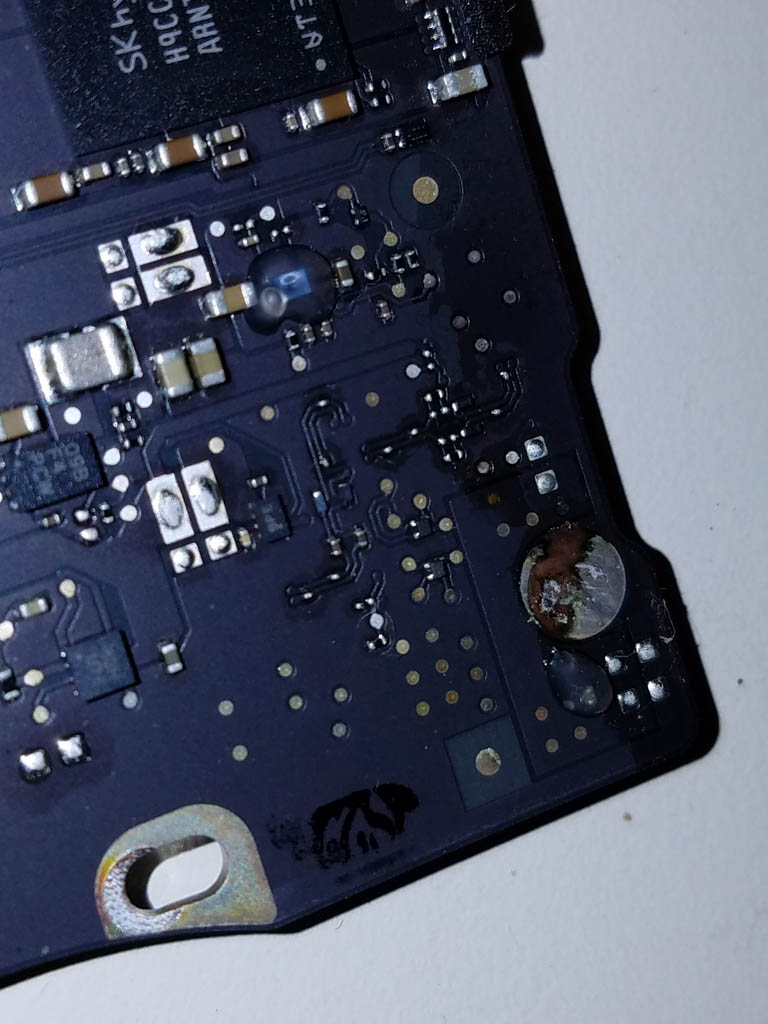
Logic board before cleaning #4
This is where the damage was done. While not visible at this size, all of the damaged parts (except one cable, shown later) were here. All of the big spots cleaned up nicely.
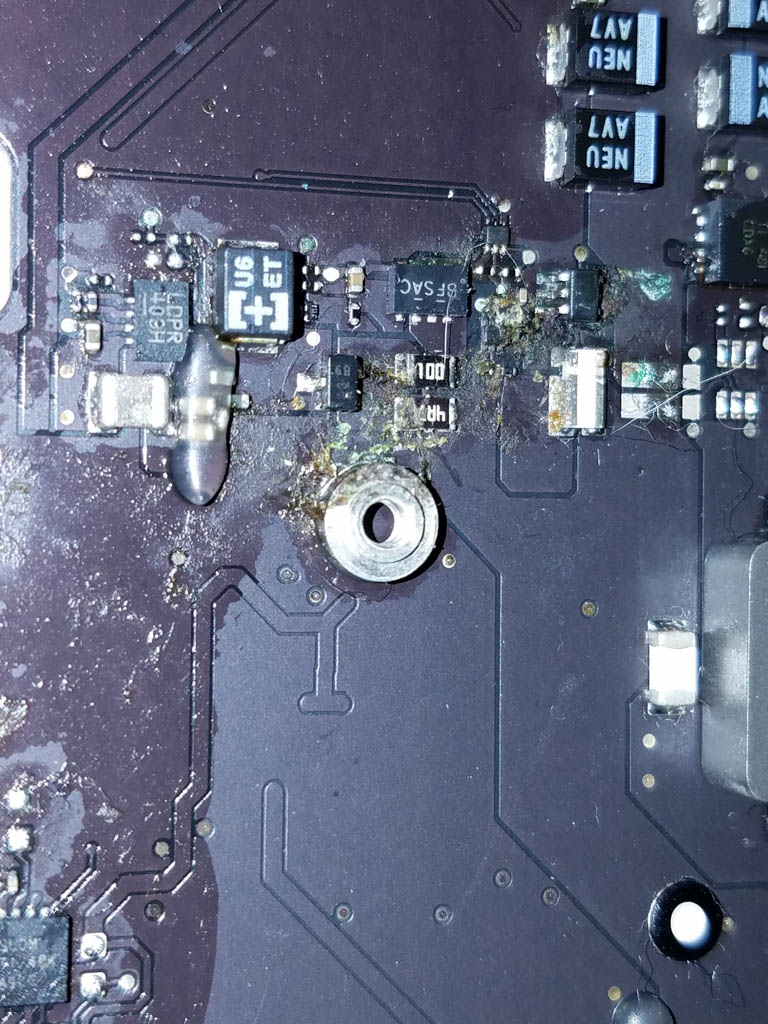
Logic board before cleaning #5
Close view of the damaged area. This part of the board handles the main 3.3 volt supply from the battery and external power. Without it, NOTHING else works.
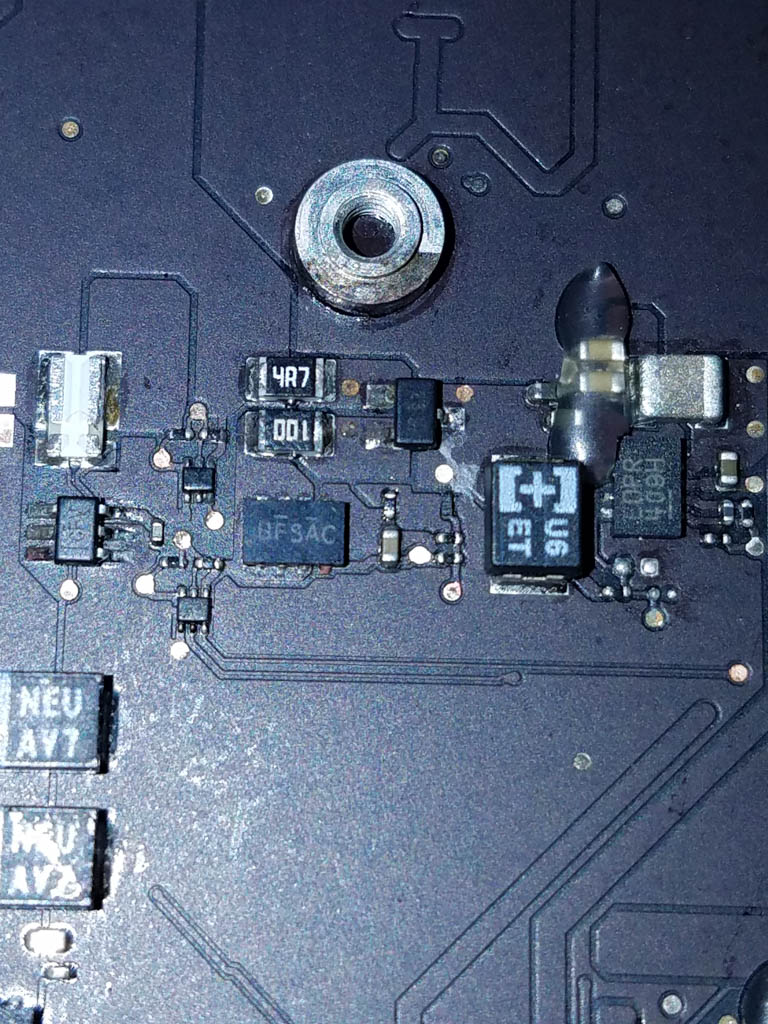
Logic board after cleaning
The same area after cleaning. It looks much better, but the damage was done. Three components failed, but naked-eye inspection didn't find anything. Time to put the board under a microscope.
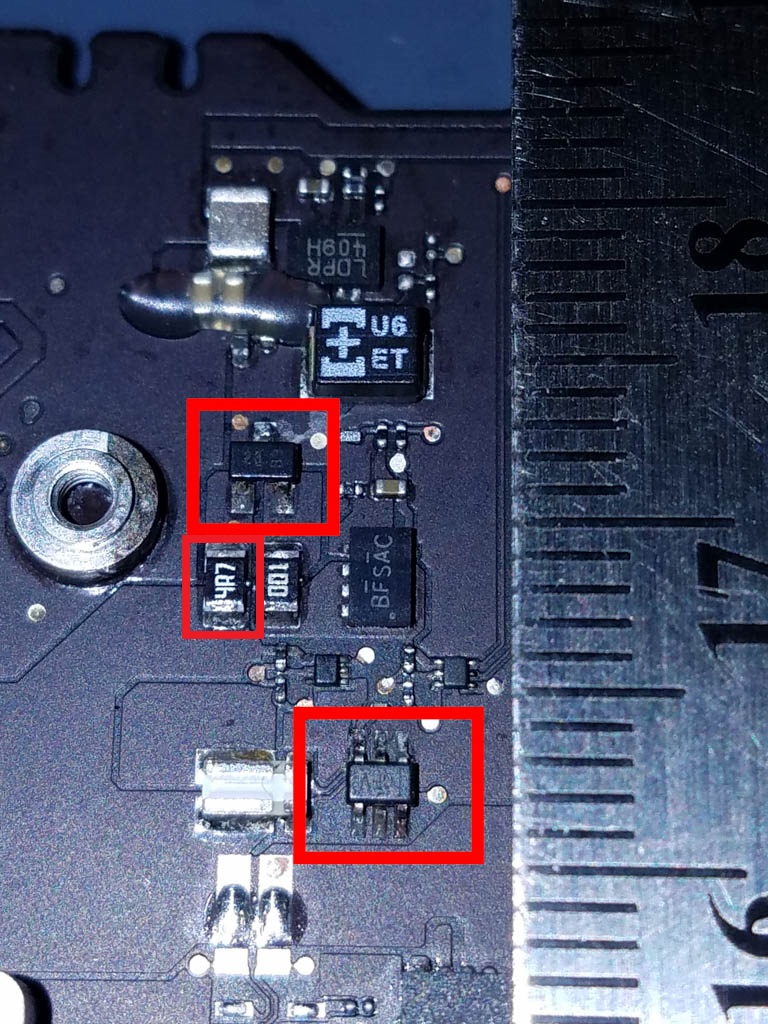
Failed components
From top to bottom: a dual diode package, a resistor, and a current sensor. The ruler visible in the photo is showing millimeters.
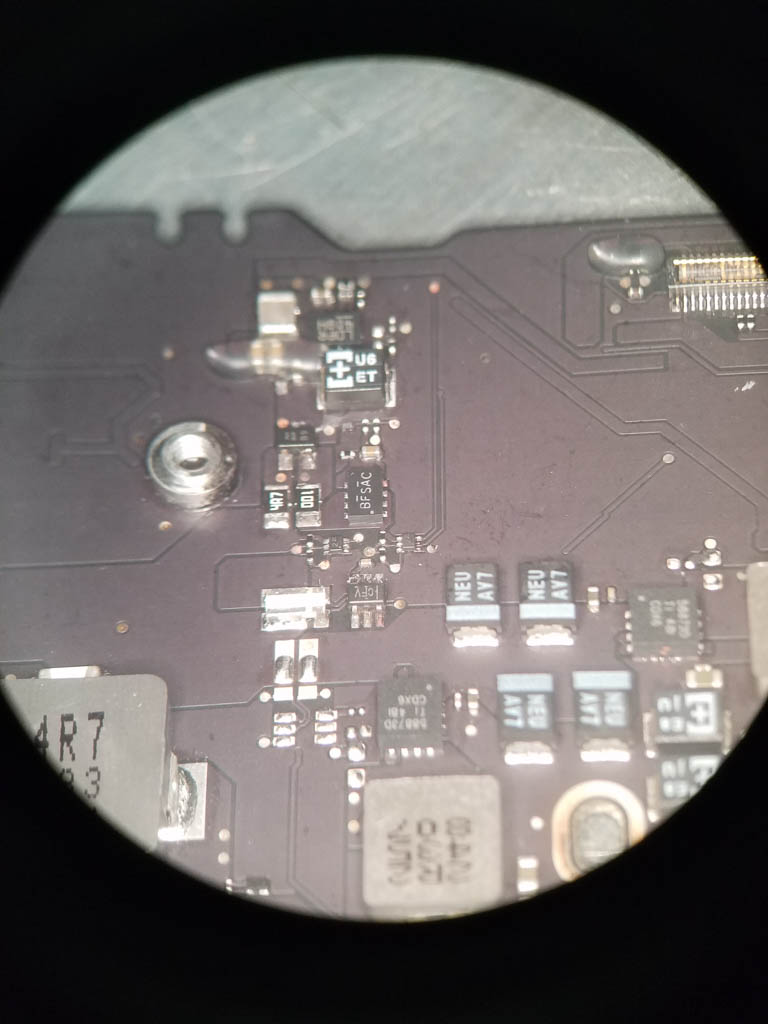
Under the 'scope
Here is the same area, under a bench microscope. I took these shots by holding my phone up to the eyepiece, and holding it very still. Not an easy task, but it worked.

Diode and Resistor
Here you can see the two input leads on the dual diode package are badly corroded. I think it was both the corrosive property of the juice, and the fact that power was flowing in this part of the circuit. The resistor (labeled 4R7) is also bad, but it was not until later testing that it was identified as such, since there was nothing about it that made it stand out.
Current Sensor
Like the diode package, the current sensor is clearly damaged. here, the top middle lead is just gone, and the top left lead is badly corroded.
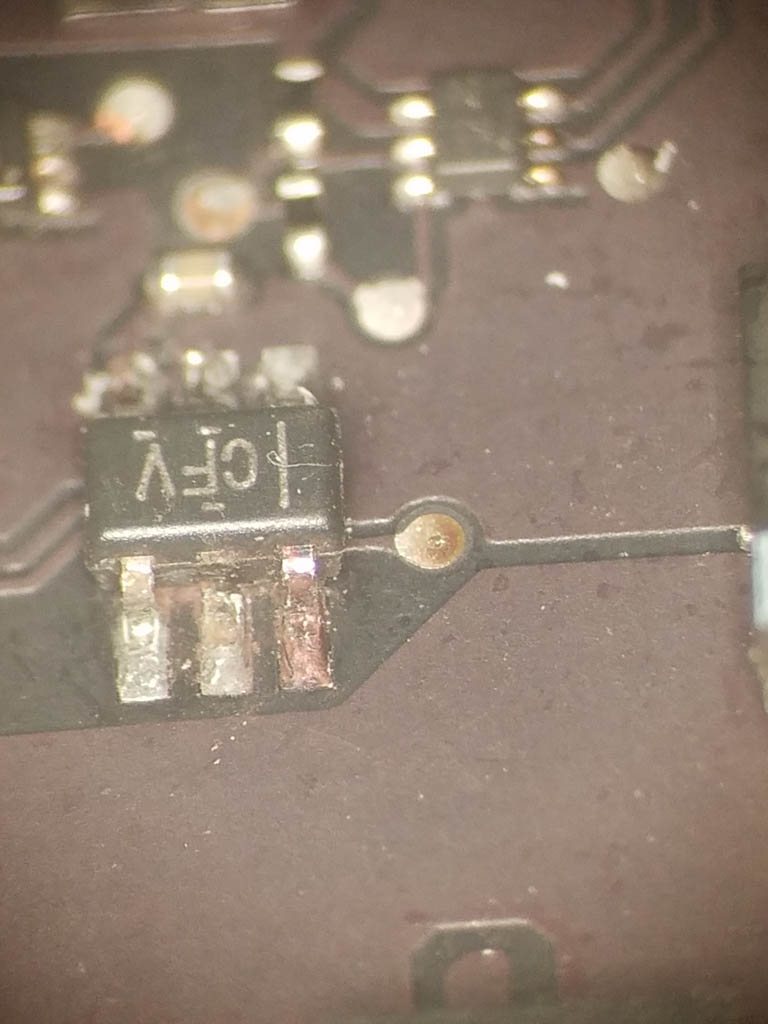
Current sensor with tool
At first glance, I though there was just some debris, like the pulp stuck to the current sensor, so I attempted to push it away with a small probe. When I pushed on it, the leg just collapsed. In this picture, it does not look very small at all, but check the next photo...
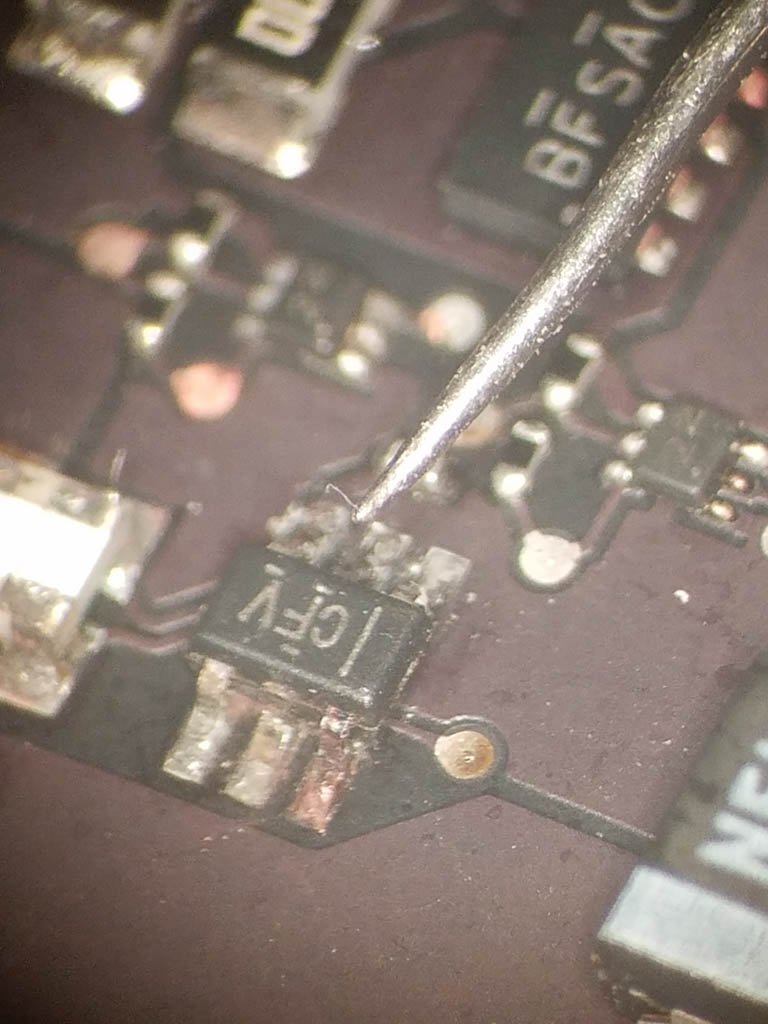
Headphone Plug For Scale
Here is the same probe, next to a standard headphone jack. The tip is pretty sharp, but compared to the parts that failed, it's pretty blunt. You can actually see the damaged area on the top to the left (but out of focus.) At this point, with parts identified, an order was placed and when they showed up, I removed them and soldered in new ones.
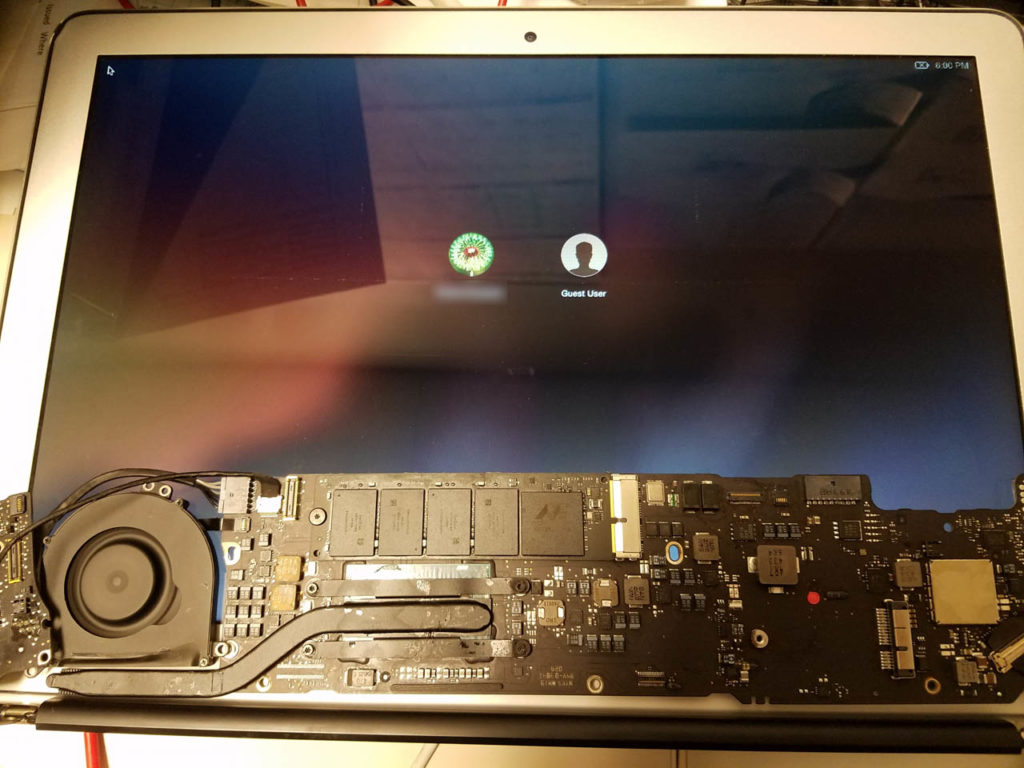
It Lives, Again!
The computer booted up on the first try after replacing the diode package and current sensor but only on external power. At this point it was also clear that the trackpad was no longer functioning.
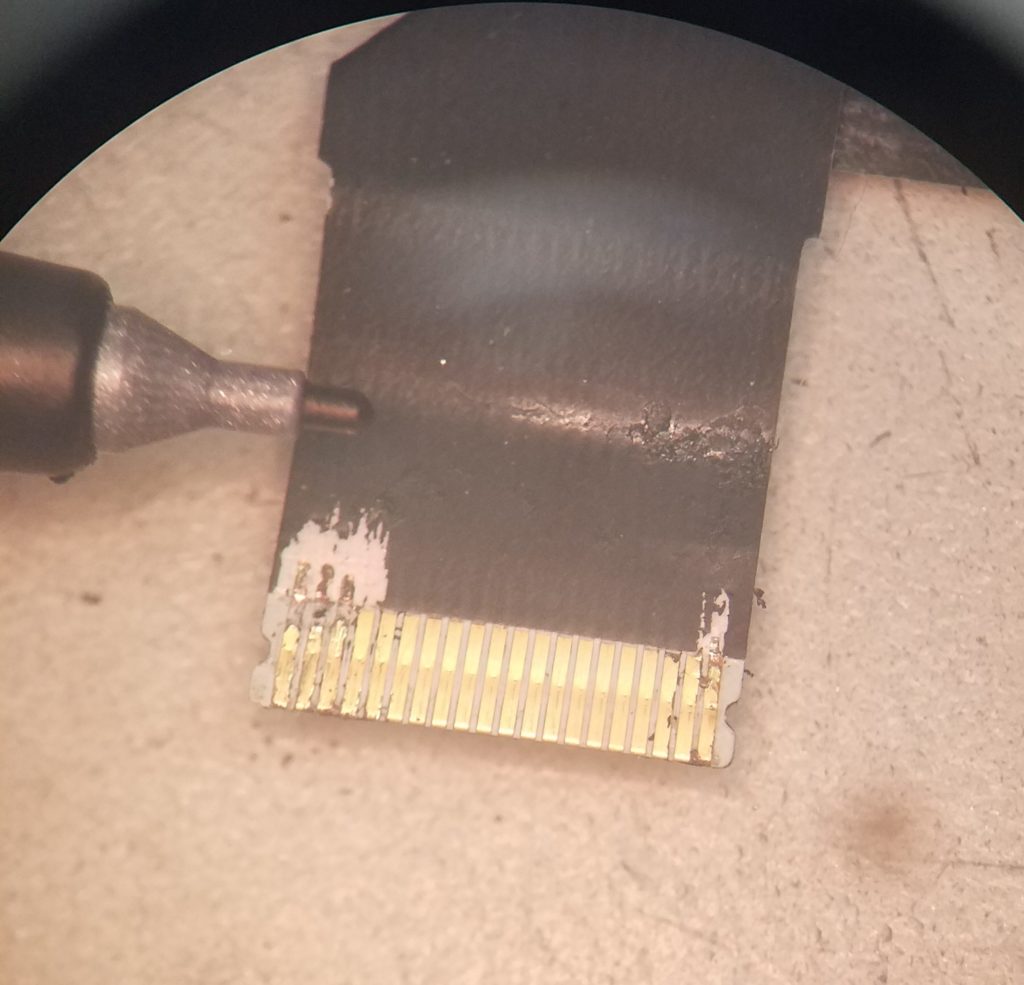
Why You Need a 'Scope
At first, I assumed the trackpad was just bad (it had some damage on it and everything on the logic board connector tested out fine) so we bought a new one and hooked it up. It still didn't work, so I spent a while retesting everything. Out of frustration, I put the cable under magnification and found the problem right away. The end of the cable plugged into the logic board had damage under the black coating. It's scraped away here to show where the traces just disappear. (Ultra-fine sharpie for scale.) A colleague at work bridged the gaps with some gold ribbon and the cable worked. The next step was testing the battery pack itself.
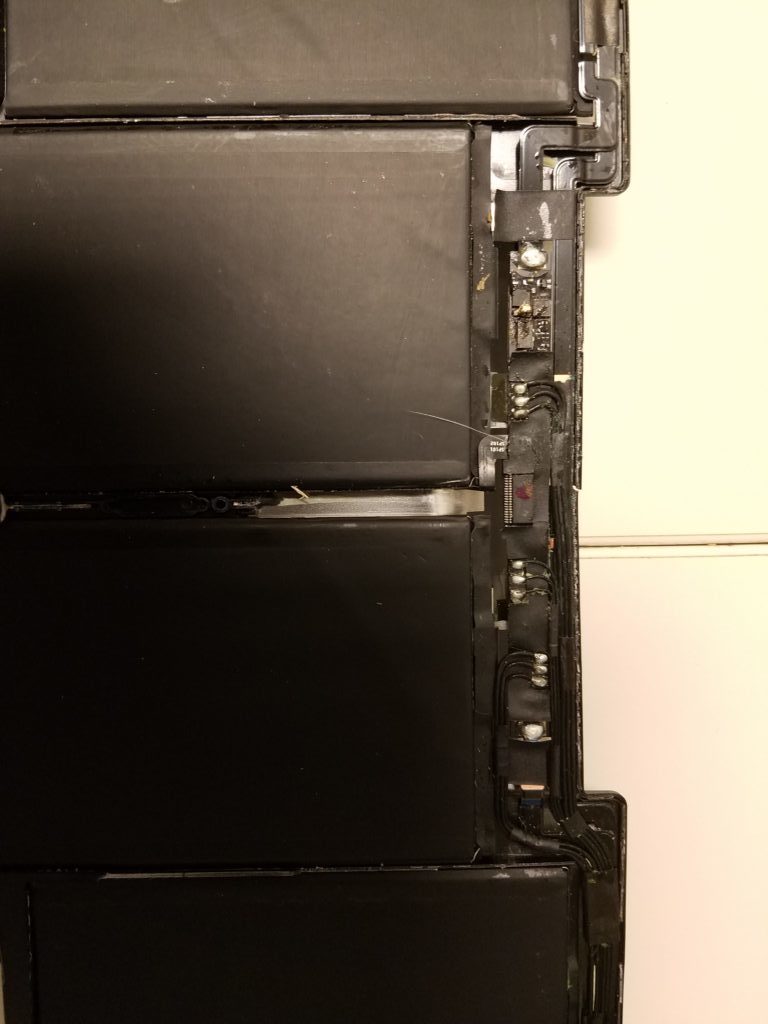
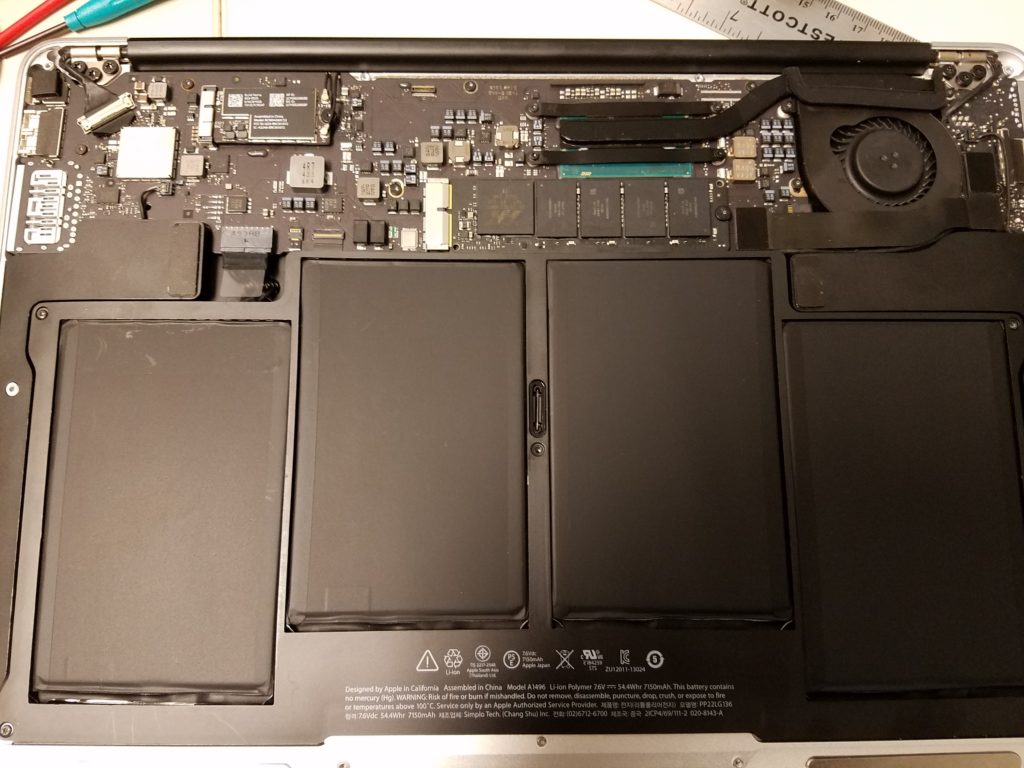
Battery pack, exposed
After peeling back some of the tape, it was corrosion city in there. Almost every part of the control board was damaged, and I did not like the idea of trying to repair a part that can catch on fire. Battery was scrapped (to a hazmat pickup bin) and a gently used one purchased on eBay.
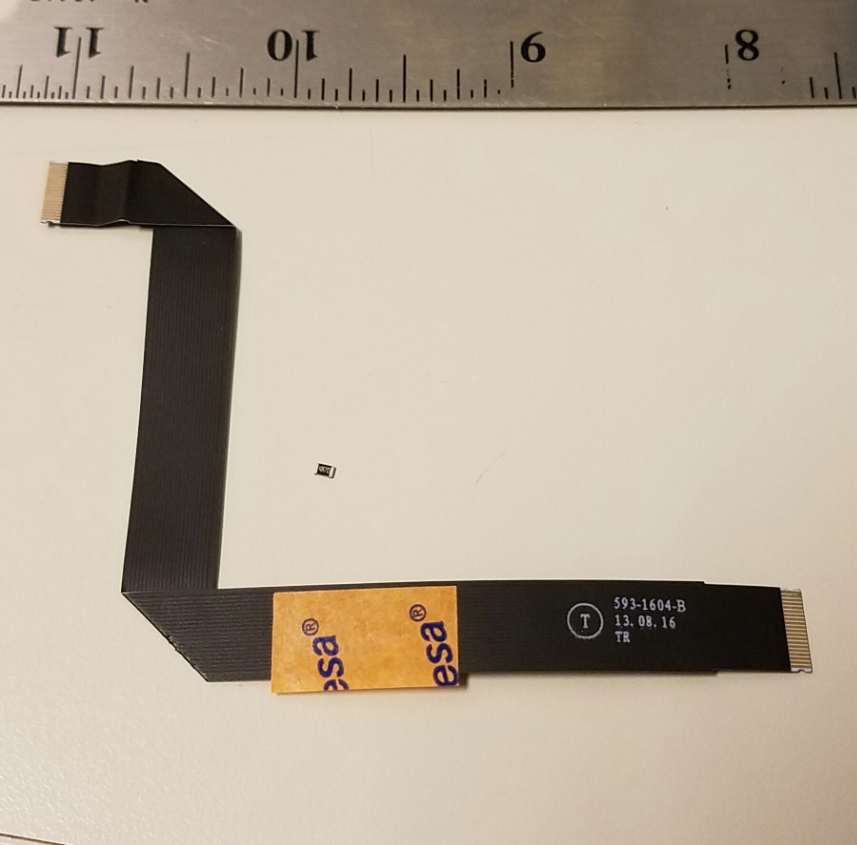
New Cable and Final Part
I knew the repaired cable wouldn't last, so I ordered a new one at the same time I ordered the resistor, and here they are next to a ruler for scale (inches this time, yay for consistency!)

All Board Repairs Done
The last close up of the logic board, showing all three parts replaced. After getting the new-ish battery installed, it still would not boot from battery power. After many measurements, and reading of schematics, the cause was narrowed down to the resistor. Tested with a meter, is was totally fried, with zero conductivity. It was pulled off, and after the replacement arrived and was installed, booting from, and charging of the battery worked like new.
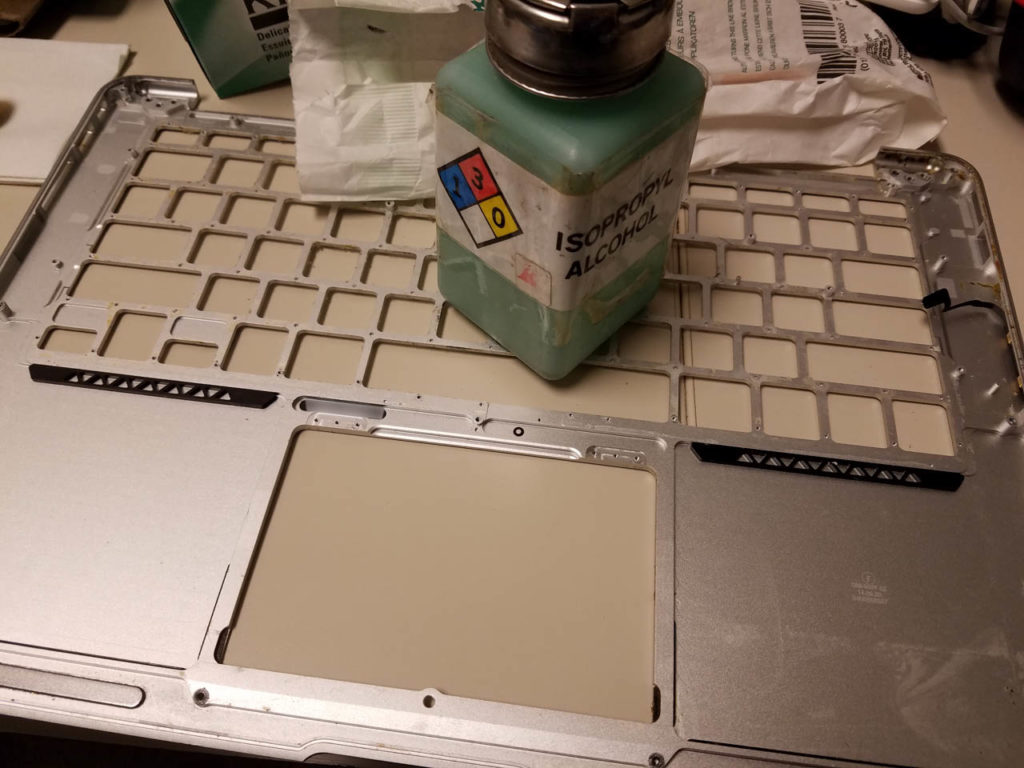
Replacing the Keyboard
In the mac book air, the keyboard is riveted to the upper frame. To remove the keyboard you have to gently press it out, popping all the rivets (while praying you don't bend the frame.) After a thorough cleaning with alcohol it was time to pop in a new one.
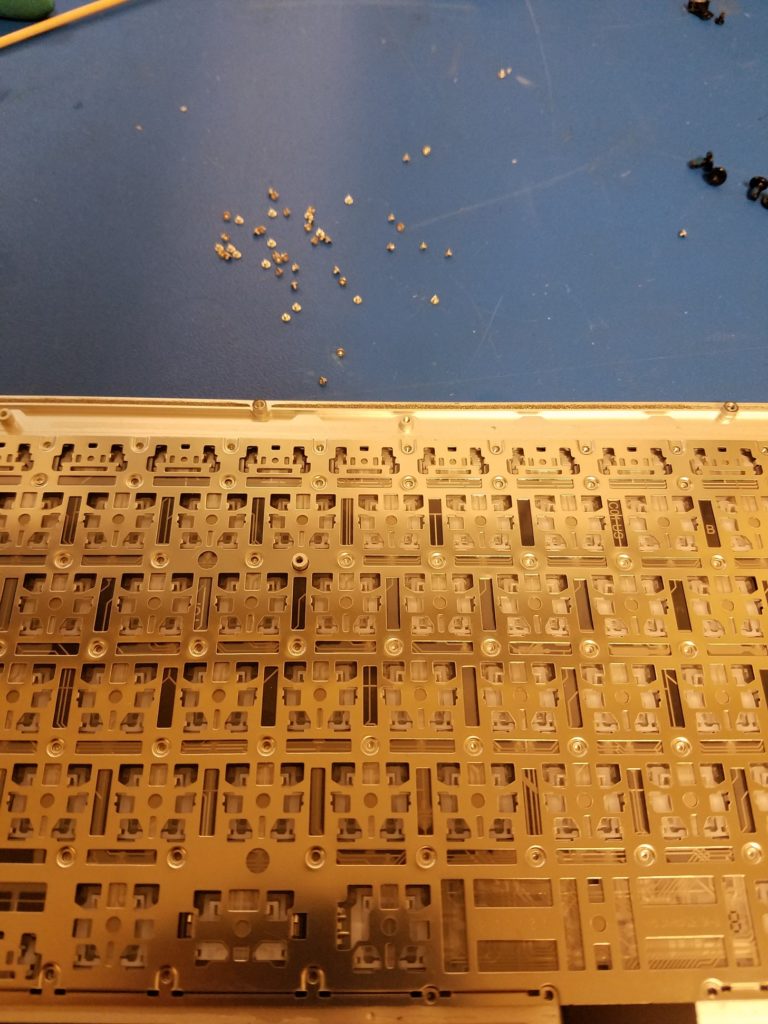
So. Many. Screws.
Putting the new keyboard in means installing a lot of tiny screws where the rivets pop out. There were over 90 screws to hold the keyboard back in. This was by far the most tedious part of the whole repair.
All Work Complete
This was the final picture before I sealed the case back up. No data was lost, and everything worked again same a it was when it was new.
This is by far, the most delicate thing I have ever worked on, and learning how to fix it was a very rewarding experience. It would have not been possible without the excellent videos on YouTube by the truly amazing Louis Rossmann, who has a whole channel dedicated to his repairs of Apple products. If you ever see this Louis: Thanks! You inspired me to just go for it, and then showed me how.